


Security for sash windows has really stepped up lately. There’s never been a better time to secure sash windows and still maintain the period character of your property. With a combination of 6 practical sliding sash window security measures, some of which cost just a few pence might I add, my home is kept safe. My significant other is also confident to be at home alone, and I get a good nights sleep knowing that to come through my windows the whole street would be woken abruptly.
The sad truth is if someone wishes to enter your home they can, all we can do is but deter to the very best of our abilities, unless we install window security grills, but not only are they unsightly, most people do not wish to accept such measures are required. I do not want my property to be a prison, though I do very much like the idea of my sash window security being adequate enough that a break in would require a serious amount of noise and commotion. It feels like a sensible balance to me, if an intruder must alert neighbours and passers by. We will start with the more basic, cost friendly options first.
Screw on staff beads
I have had to repair too many sliding sash window break-ins that have had the internal staff bead literally kicked off as a result of not being attached firmly. To get in a burglar needs to apply plenty of pressure to the lower sash. A good hard kick will do if the beading is not correctly installed. If the sash does not have security pins(more about these later) pinching them together then the catch will slip and the lower sash will swing inward. To remedy this simple problem we install the staff bead with pins into the correct position first. Once fitted we will pilot and countersink screws into the staff bead. We then apply filler over the countersink. There is no need to drill the screw heads to prevent easy unscrewing as the mould is internal and should the burglar have access to the screws he would already be inside!
Screw on front cheek
Much in the same fashion we have screwed staff beads internally, front cheek which holds the upper sash in place and also stops it falling outwards, must be fixed with screws as well. I have also repaired sash windows which have had the front cheek removed and top sash swung outwards. It’s a mirror of the lower sash and staff bead, except easier because the front cheek merely requires chiselling and levering off and outward. To resolve this we need to fix from two directions. We need to fix into the pulley style as well as fix into the timber lead edge itself. We should countersink and fill so as to not cause a weakness for moisture ingress, I personally would not recommend doing this if you’ve just redecorated, but on a window thats being refurbished it’s an excellent countermeasure,
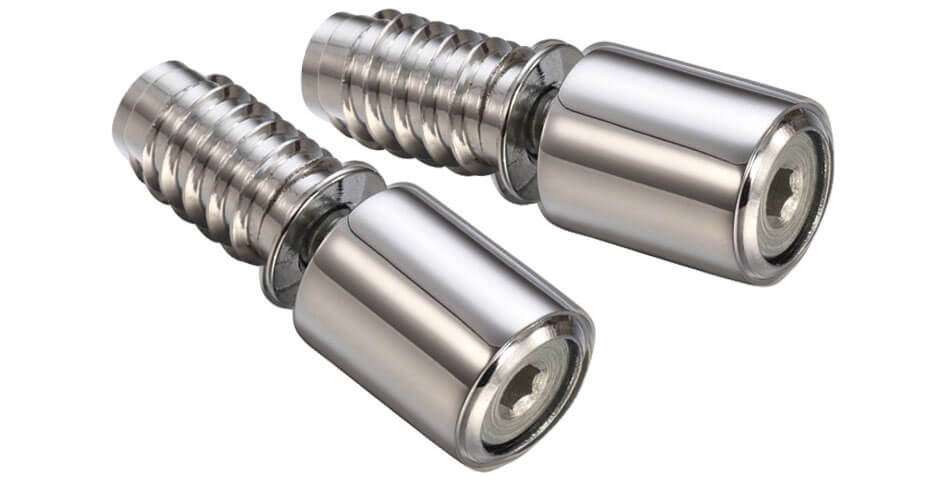
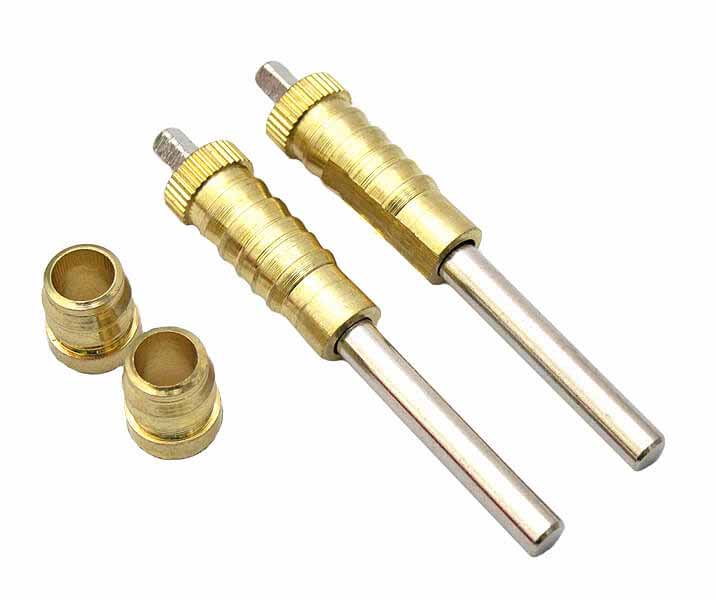
Security restrictors
Once we’ve secured the staff bead and front cheek we can look at combining the effect with security restrictors. We always install two sets of grommets. One that allows 100mm of travel and one that allows none at all. Installing security restrictors is your bottom line sliding sash window security. They ensure that at a minimum a burglar will need to break glass to enter your property. This occurs because the grommets are so well bedded into the sash, that any force applied via leverage will twist and distort the sash, rather than pull out. When enough force applied it will cause the glass to crack and break. It is an excellent deterrent and by far the best method of improving security for sash windows.
Security pins
Security pins are drilled and installed through both sashes. They then stop any movement of the sash. These are not quite as good as security restrictors because they do not offer a 100mm opening option for ventilation. Combined with security restrictors, front cheek, and staff bead upgrades they make a window very reliable.
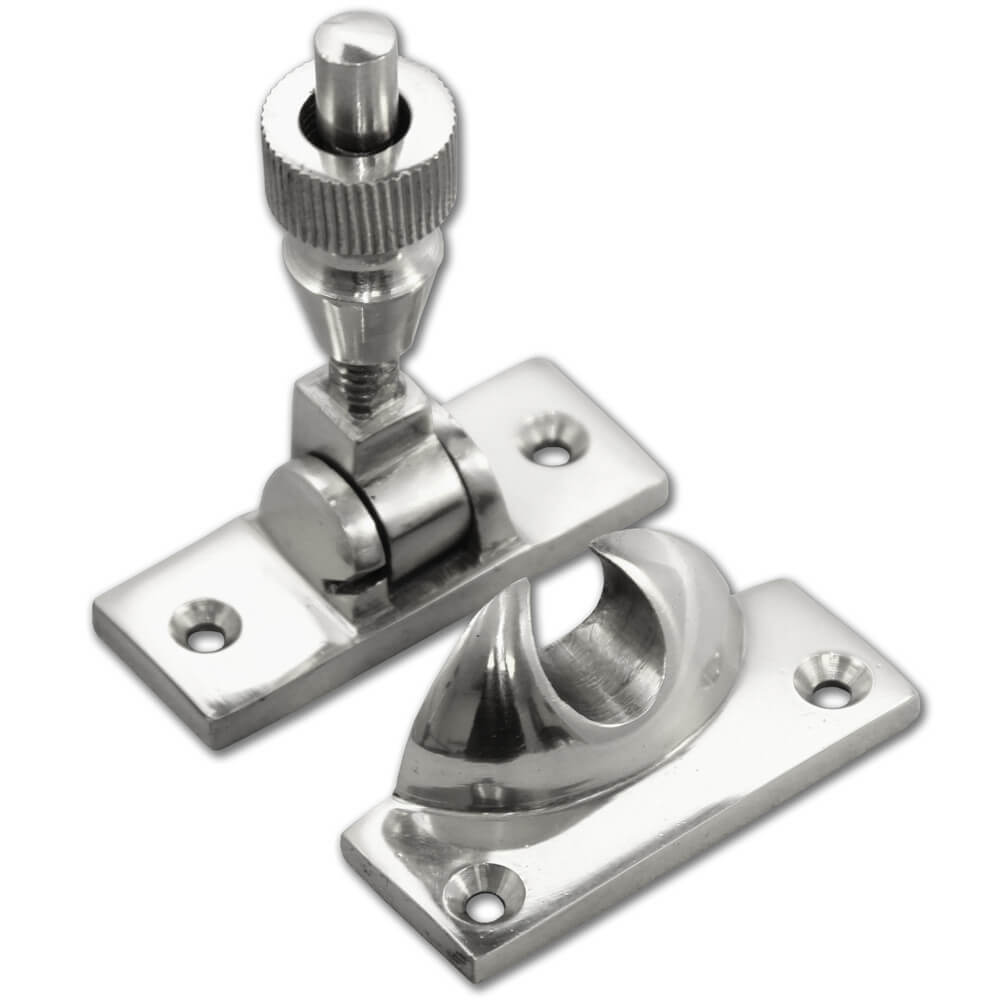
Quality Latch
If your still reading, your taking your home window security very seriously indeed. So the next stage in making your sash window as burglar proof as can be without becoming a prison is the latch. I prefer Brighton Fasteners over Fitch Fasteners because they come with the added benefit of being a screw tight function which means we can dictate just how tightly we pull our meeting rails together. This is of tremendous security benefit, because if you did not have security restrictors a knife or thin blade could be pushed between meeting rails, and pop the lock and window wide open! The other added benefit is when draught proofing installed, it also improves the air tight seal which is an additional bonus.
Laminate or toughened glass
If you’ve followed the previous steps then your window will be very secure indeed and the commotion required to get in would create far too much risk for any potential burglar. That said, with these measure in place, you can now make your window almost impenetrable. I say almost because I have tested 4mm toughened glass with a sledge hammer and it has bounced off! However after repeated attempts (I was trying to break the glass into small pieces for purpose of recycling and collection in our recycle skip) I was able to break it! However I did so by applying pressure to the edge, which if your window is glazed correctly, will never be exposed. If we install toughened glass combined with the other sash window security measures I believe this will leave you with a peaceful nights sleep sash in the knowledge your windows are uprated beyond the reach of many a petty criminal.
Seal your sash shut with silicone.
If budget does not allow, and you do not require ventilation, there is the option of sealing the window shut with silicone. This is quite useful in the situation that we have a three window bay. We don’t need to pay for draught proofing on three windows, it’s extremely unlikely we will use them all at the same time for ventilation, but that’s something for the homeowner to decide the personal preference.