


I’m going to teach you how to replace a broken sash cord for less than £10, and I’ll also go into how to entirely overhaul your sash window, replacing all of your sash cords at the same time. This may take a while but is well worth replacing all cords at the same time to ensure you have a lasting job. Nothing could be worse than replacing one cord, to find 12 months later another goes. Once one breaks, it’s a good indicator they are all ready for replacement, in a similar way to the tyres on your car.
This article is quite lengthy and I’m sure you’ll appreciate the detail when you carry out this task, but in order that you can fast track I am going to provide a handy summary of each section with anchor points, to try to provide a little structure, but please remember, the longer explanation carries many trade tips to make this job easy, and stress free. Remember, reading and watching an expert make this look easy is one thing, opening up your home to the elements is another.
In a later article we will talk in depth about the merits of double glazed sash windows, however first we need to master the basics of sash cords. Once we are fully capable of removing and rebuilding our sash window, then there is nothing stopping us installing professional sash window draught proofing systems, and effecting repairs much in the same way that we do on a daily basis. The value of your home will significantly improve if you spend enough time working on your sash windows. Well then let’s get started on the basics first!
What You Need to replace a broken sash cord.
The process of Replacing a broken sash cord.
If you read the in depth guide you’ll see I go through a few common problems encountered when you replace a broken sash cord, and what to do if it starts going wrong. Replacing a broken sash cord is easy if your following this guide, until things don’t go as aspected, or someone has previously botched it and made a difficult job for anyone following. Luckily for you, there’s an opportunity to levy on twenty years experience, so anything that could go wrong, you’ll be covered in this article.
You’ll replace a broken lower sash cord in less than an hour with my professional help, a while longer for complete cord replacement and you’ll need a good few tools which I’ll list in just a minute, as well as a couple of dust sheets, a plastic dust sheet, or covering of some description and some materials which I will go through as well, and where to get them, in order to do the job cheaply. You might be wondering why I’d give away this information and there might be some catch? Absolutely none, when a customer rings to replace a single sash cord or replace a pane of glass, we simply cannot be competitive as there is no economies of scale – we won’t say no, but it’ll cost nearly three times as much to replace a single sash cord per window, compared to someone looking to replace say ten windows. It is in my interest that you can help yourself. If you really don’t want to do it, you can give us a call and we will be glad to quote, but with an understanding it’s not cheap for one window, and you can take a look at our standard prices in the link provided, but the rate will not be the same for just one window, and really worth having a go at this yourself. Remember, in recent times gone by, this was a standard home chore for the man of the house (without trying to be sexist). I firmly believe this is a job a woman and friend helper could do as well.
The tools required to replace a broken sash cord.
– Hammer.
– Pliers.
– Side cutters.
– Thin piece of lead and a length of thin string approx 2 metres. Tied together to thread down each pulley – more on this later, just know now it’s called a “Mouse” Here’s a picture of it:

– One inch chisel is ideal, but if you don’t have one that large, the largest you have will do, it’ll just mean taking extra care not to scar the frame and sash.
– A scrapper is handy but not necessary, you could use your wrecking chisel.
– Probably a step to reach pulleys.
– Utility knife
– Pencil
Materials required to replace a broken sash cord.
– Sash cord, one knot will easily do five or six sash cords. Note not windows, in window terms it’ll do over one, maybe one and a half.
– Panel Pins – 40mm is ideal
– Annular rings, I prefer one inch, any longer you run the risk of catching glass when you attach the sash cord.
– Bit of sand paper, say 120 grit for removing loose debris and to key if you intend to touch up the sash window after hanging the cord.
Optionally for decoration and touching up (depending on the condition of the window prior to cording – which is something you’ll need to make a call on yourself):
– Acrylic, water based sealant, a tube is more than plenty for a few windows.
– Two part epoxy filler for deep blemishes and some normal powder filler the decorators use for facing up.
– Primer, Undercoat, and Gloss.
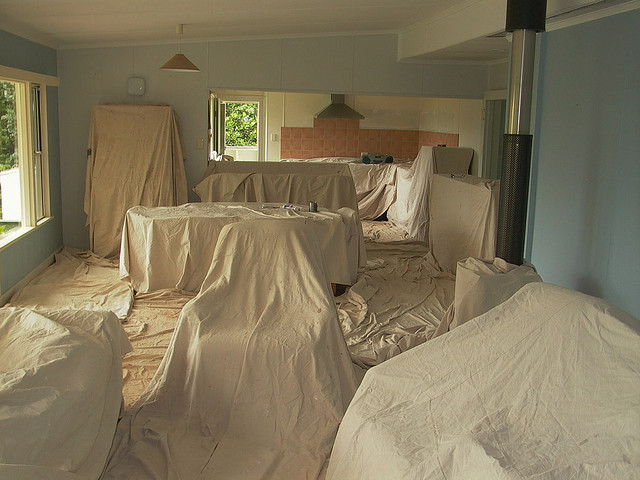
1. Lay your dust sheets.
It’s worth repairing your sash windows, but the first and most important job is to ensure you do not make more work from carrying out this task and damaging your carpet or furniture, is to lay some dust sheets. Anywhere you think it’s possible dust and debris might reach cover up. The second job, which is a trade secret – lay a plastic sheet directly on top of the dust sheet in close proximity to the window. You’ll do this because the sash weights are cast iron and will be rusty, and furthermore, rust will fall off and it will not come out of carpets. You will permanently soil your carpet if rust comes into contact with the pile. If you have a beautiful cream carpet, then be even more aware, because old sash window weights are destroyers of lovely light carpet.
How do I know this you’re probably wondering? Approximately ten years ago I quoted on a job with old carpets which subsequently the quote was accepted. A very straight forward job of draught proofing a bay window on the ground floor with an old, tired, carpet. The sashes were in relatively good condition, and no complications. I sent a team, one of which was an apprentice and green behind the ears. Incidentally, that apprentice is doing sash windows still today. Anyway, to cut a painful story relatively short, between the period I quoted, and doing the job, the homeowner in their wisdom, scheduled the carpet fitter. Now, I don’t like talking ill of people, and I am a very nice chap, I mean, I am here teaching people how to avoid these problems for no benefit other than I help you do a job I’d be paid for, after all, but this customer, was not the smartest of the hundreds and thousands I’ve dealt with. They gave me no warning they would install carpet of extremely high quality, pile with so much depth, that your feet literally sink as your walking, and ever so comfortable, and in light cream, off white almost, total luxury. Anyway, our green sash window apprentice puts dust sheets down, without plastic, drops the weights directly onto the cloth dust sheet, totally unaware for four hours he’s ruined a £1000 + carpet, worth more than the job! The dust sheets pulled up, the stain is obvious, it won’t come out from hoovering, it’s even more unlucky its been damp, the rust is now in the carpet for good.
Three professional carpet cleaners all arrive, at my expense of course, and all with the verdict the pile will be damaged before it’s cleaned. So we chalk that one down to experience then? I highly recommend you correctly lay a plastic dust sheet, and then take a further step which I will go into at the right time in this article. This applies to any valuables that may be damaged, not just the carpet!
2. Ready your tools, materials, and a space to replace a broken sash cord.
The key to replacing a broken sash cord is organisation, following this instruction exactly, will make anyone capable of doing this job in less than an hour if it’s just a lower sash, assuming you can swing a hammer well enough! Prepare a space, with a dust sheet that you can lean the sash. Ensure theres no problem leaning the sash against the wall, and it won’t damage paintwork or wall paper. The key to making this worthwhile, by doing this yourself, is that no other sacrifice or damage is made in the process elsewhere. You wan’t your time working on your sash windows to improve the value of your property.
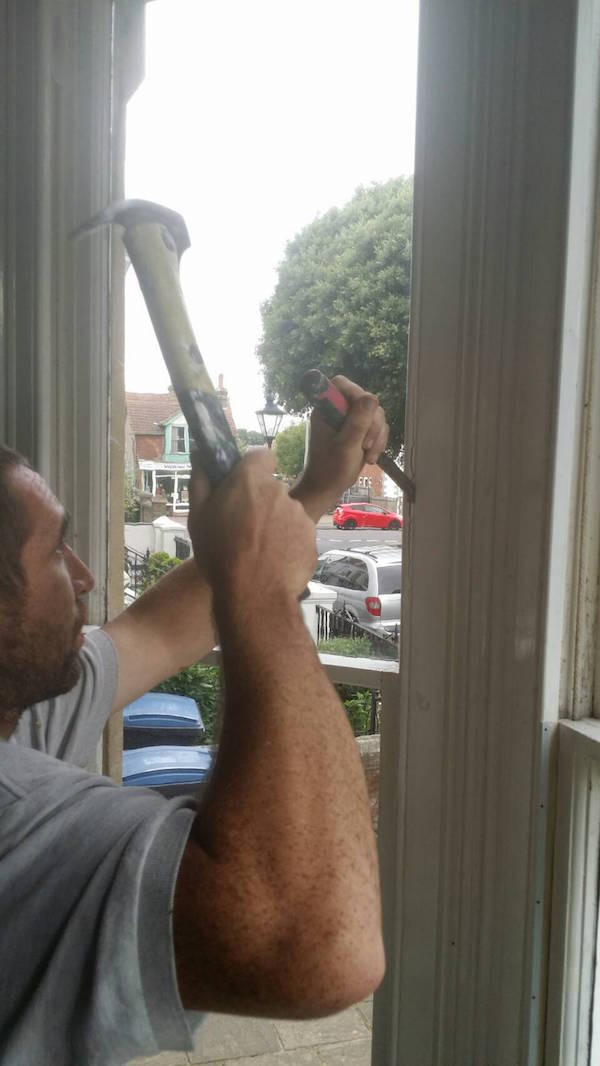
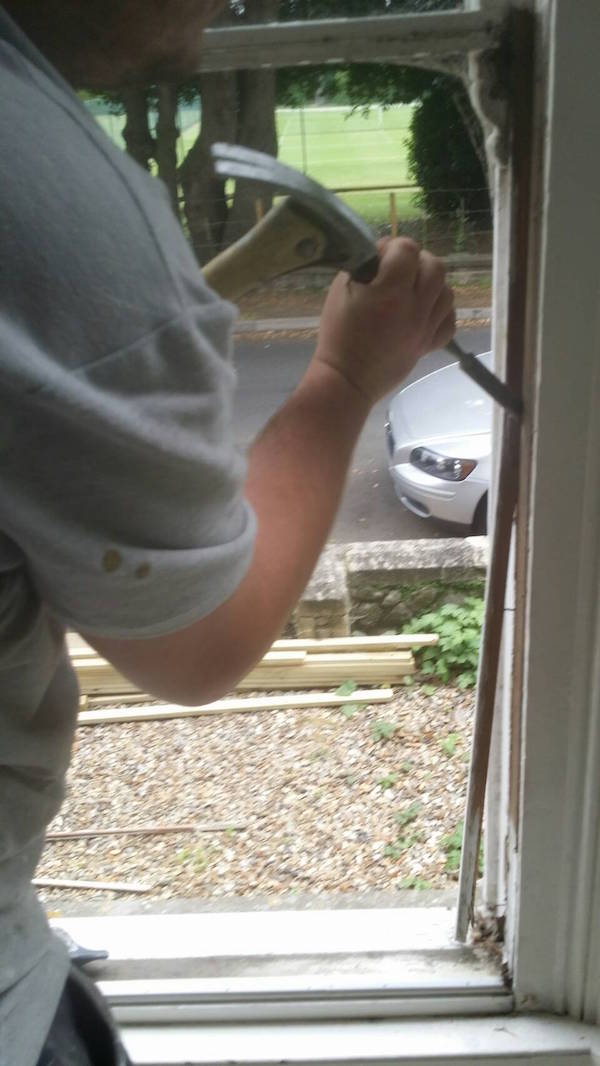
3. Remove the staff bead and prepare it for refit.
Removing the staff bead is quite easy, take your utility knife and make a cut between the frame and the beading. This will reduce the likelihood of paint being damaged or chipped. A point to note, most injuries and cuts occur when the utility knife slips and your hand catches the frame. Be careful and steady, with a firm arm and purpose. Once you’ve scored both sides (you need not remove the lower and upper staff bead for a simple re-cord) you can place your chisel to remove the staff bead. Always insert your chisel just above the lower sash. This way your chisel can go right through to the other side, without hitting the lower sash, and this loosens the staff bead much more effectively.
Depending on how well attached, you may need to do this higher up the frame, but normally with one hand you’ll pull away from the frame, applying pressure, and the other, use the chisel to lever gently. This method will ensure you do not snap the staff bead. Once both sides removed, you’ll need to clean this staff bead up for refitting. The best way of getting a good job is to ensure the staff bead is clean, and can sit nicely against the frame when we are ready to re-attach. Pull pins through the staff bead, it’ll do all damage on the back edge of the timber, which you’ll be fitting against the frame. This will reduce time making good after. You’ll notice caulk or filler on the frames edge, this also needs cleaning off.
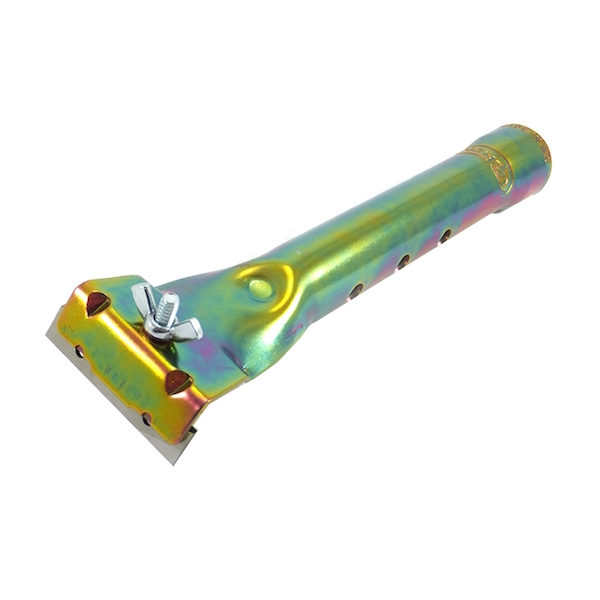
To do this I use a scraper specifically designed for the job. Take a look at the picture attached above, but for a few windows it’s probably not worth spending £20. Just use the side of your wrecking chisel, pulling down the frame and staff beads being careful. If you intend to do some DIY sash window sill replacement or DIY draught proofing however, you shouldn’t be without one! If your sash windows are painted shut or stuck then this is the ultimate frame cleaning tool.
4. Remove lower sash.
Let’s assume it was an upper sash cord that broke for a minute and not a straight forward lower sash re-cord, and your two lower sash cords are in tact. Before cutting them, just lift the sash, and check it’s well balanced. If the sash is slowly creeping down, you’ll know you need to check the weight and if it stays put nicely, you’ll know it’s fine, on the other hand, and this is quite possible. pulling the sash down is difficult. It’s a sign of two things. The first which is very rare, being the weights are too heavy and need replacing with lighter ones, or secondly your pulleys are not rolling freely which is very common for sash that are over painted. In any event this is a great time to diagnose those issues by simply sliding the window up and down. Cut the cords with your sharp side cutters and lift the sash out the whole. Place the sash on the dust sheet, and with your side cutter, remove the old cords from the side of the sash. This will range from easy, to extremely difficult.
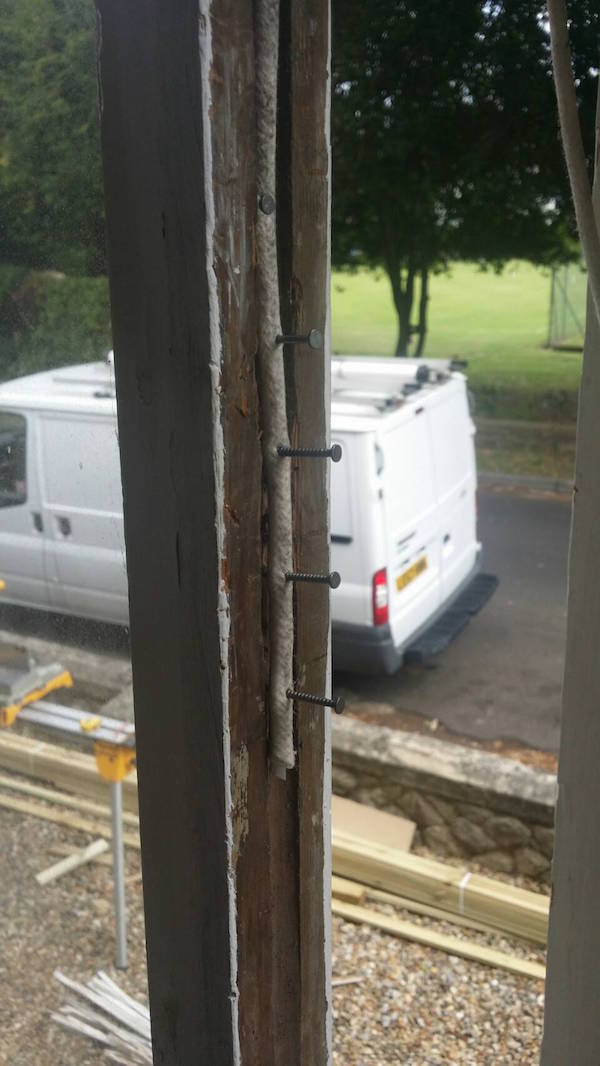
The times I’ve seen nails so long they would nearly hit the glass just blows my mind. How anyone could go to the lengths of removing their sash, but wouldn’t spend fifteen minutes in a hardware store buying one inch annular rings shocks me. Be organised. Breaking the glass would make the whole process uneconomical!
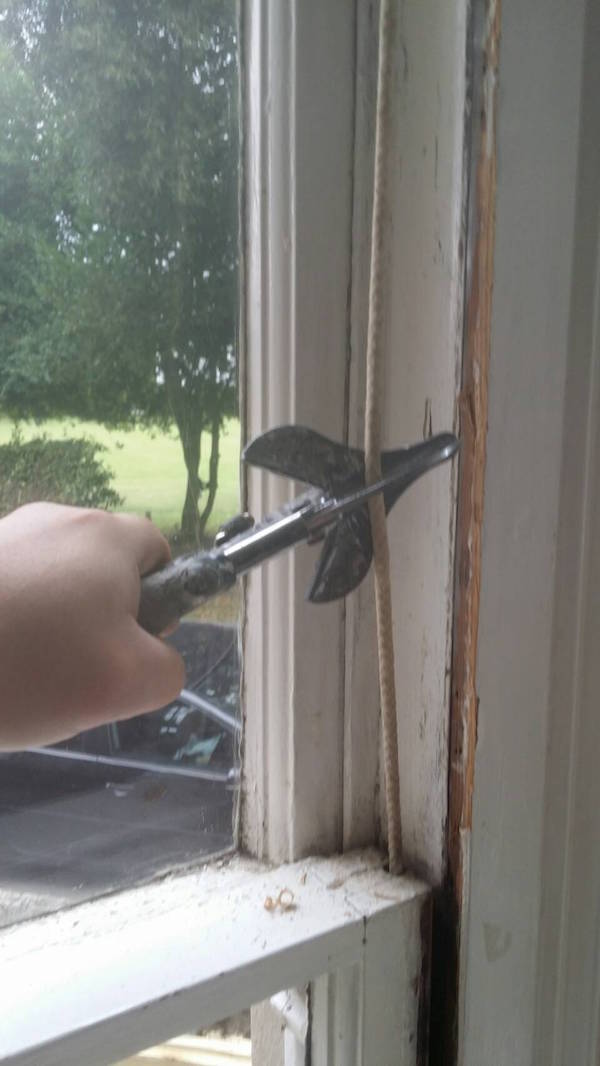
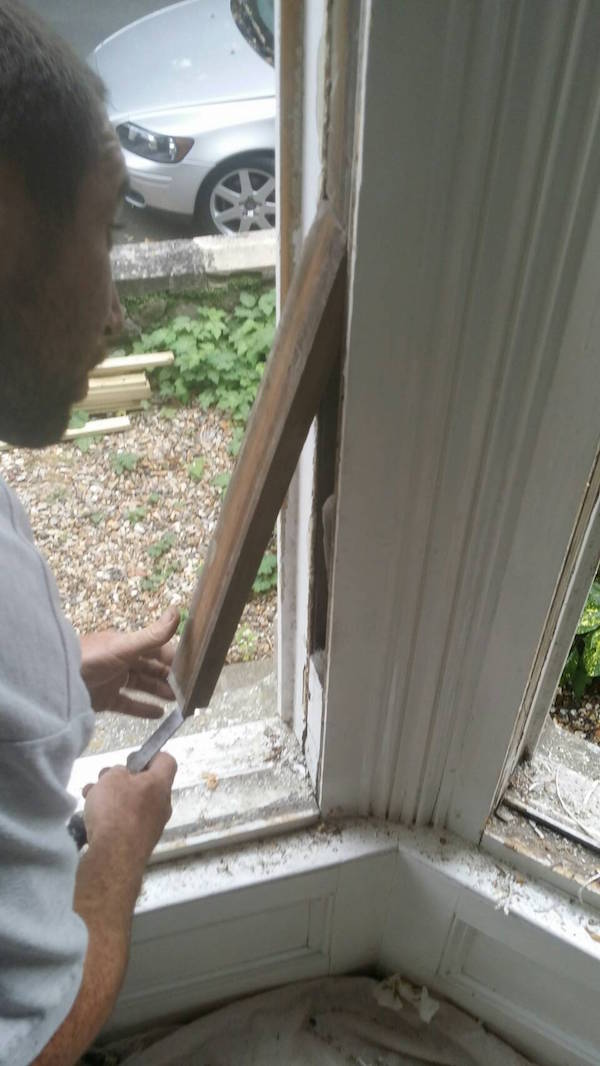
5. Remove the parting bead.
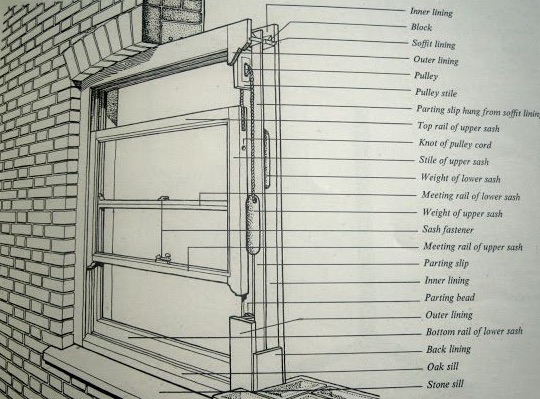
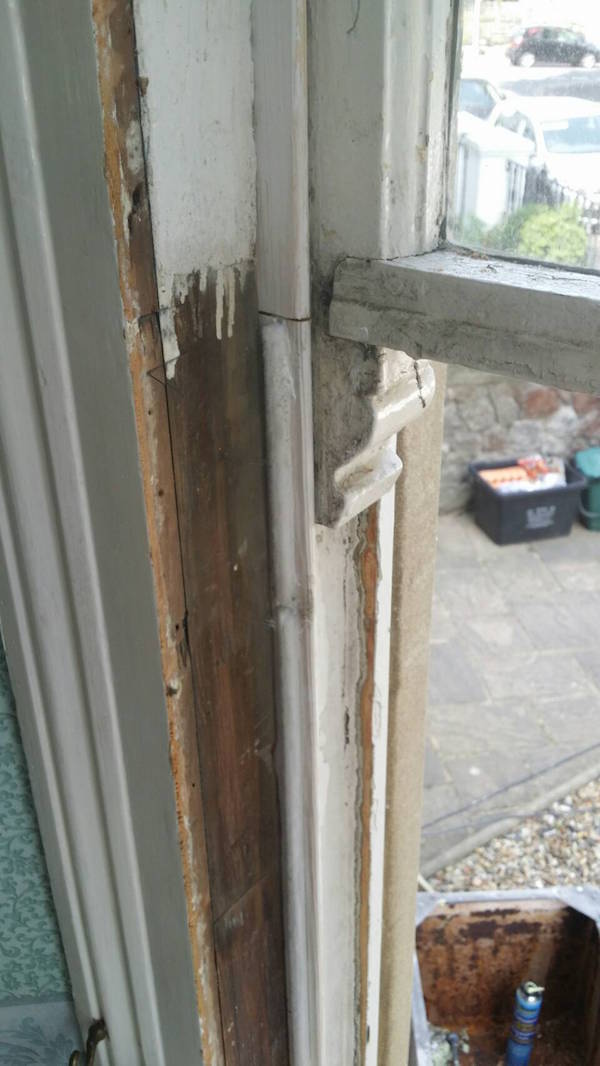
Take a quick look at the diagram provided here, you’ll see the parting bead is fitted into the pulley style. You need to insert your chisel as parallel to the parting bead as is possible to ensure you remove the parting bead without breaking it. Start at the bottom and work your way up slowly. Your far more likely to snap this mould than the staff bead, so it’s all about sensible pressure and taking it steadily. Once removed pull any pins through the back edge, in the same way as the staff bead to avoid damage to the face timber. Then clean out the parting bead groove well and also clean off the parting bead, ready for re-fitting when the time comes.
Take a look at the picture above to understand the parting bead, and why you need to point the chisel blade into the box. The parting bead slots into the groove and your effectively levering it out.
As you can see we will start at the bottom, slowly working our way up. This gives you your best chance of keep the trim in one piece. Be warned, it’s fragile.
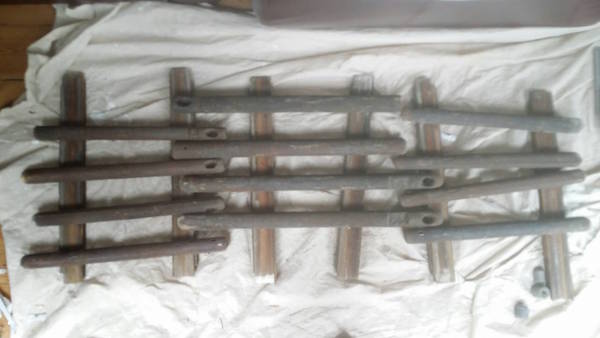
6. Remove the lower sash weights.
Previously in the “remove lower sash” stage, you cut the lower sash cords. Now is the time to retrieve them. Pay close attention, get the order right, and this will be a breeze. Open up the pocket carefully and then place the pockets on the floor.
If the sash was under or over weight, you need to weigh sash, and determine what add weight is required(assuming the weights are under). Underweight is far more common because interestingly a sash weight loses a pound in rust every hundred years. So by now Victorian sash weights as a pair are going to be 3 lb lighter than when they started! Credit should go to my farther for teaching me that trick, he’s been involved in sash windows for thirty years now. I’ll go into where to buy sash weight add ons later. If overweight it’s tricky – are you skilled with a grinder? You can cut the weights down. More preferable is that you replace the weights for the correct size. There are hundreds of scrap yards in London carrying sash weights. They are not used for scrap all that much as they sell much better as a 2nd hand sash weight, which is handy. Simply google “2nd hand sash weights London” and you’ll have plenty of choice because lots of people need to replace a broken sash cord. Just to point out, over weight is always because of the previous installers error, or randomly the window was glazed with a thinner glass. I would say overweight does not occur to more than one in a hundred windows. You’d be extremely unlucky if you got this scenario on your first go!
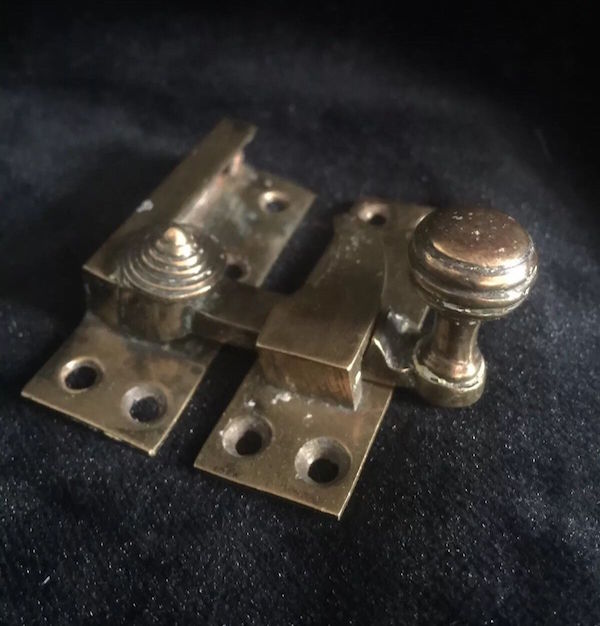
Architectural salvage yards always have sash weights as well. I don’t go for the weights, I go for the beautiful old Victorian beehive catches that have been cleaned up. They cost an arm and a leg but don’t they just look the part. I normally give them to clients at cost price when they are having sash repairs, or draught proofing installed. Retaining period property features is a good way of maintaining and protecting the value of your home.
I’ve side tracked myself with architectural salvage, sorry back on topic of replace a broken sash cord:
So to get the weights out we removed the pocket and placed them neatly on the floor. Note the pocket is hinged at the top, always, unless it was not made correctly. So lever from the bottom and the pocket will just pop straight out. Then carefully lay the weights on the pockets.
Remember I pointed out an extra step to save your carpet? Here it is, lay the weights on those pockets, off direct contact with the dust sheet. This is preventative. If for example the plastic split, you’d be vulnerable to damaging your carpet again. Next, remove the old sash cords from the weights and we are ready to move on.
7. Remove the upper sash to replace a broken sash cord.
Pull the upper sash down and check the weighting, following the lower sash procedure. A great tip here is to pull the upper sash right down to the sill, and then cut the cords. You significantly reduce the chances of breaking glass, and the job is much easier – if you have a hand that’s good because you can gently lower the cord to stop your sash weight crashing down inside the frame. Take the sash out and then remove the old cords, as we did for the lower sash, then neatly rest the upper sash on the lower – you’ll be refitting the upper sash first anyway so it’s the right order. Then take the sash cords out and check the weight of the upper sash in the same way as we went into detail for the lower, with a slight exception. Replace a broken sash cord trade tip: If the weights are a couple of pounds over, this is ideal as it’ll pull the sash snug against the head of the window when you come to refit.
8. Re-cording to replace a broken sash cord.
So we’ve correctly weighed the sashes, and added any weight required (if it was required). Remember if using add weights, that are a pound each. Let’s just imagine you needed 4lbs. Place 2 lbs either side to keep the sash in perfect balance, not just up and down, but side to side. Fitting all the weight on one side would pull the heavier side toward the frame, and result in less smooth travel of your sash when finished.Let’s use the example of a sash that is now 24lb, but you only have two 10lb weights. Resist the temptation of just buying one 14lb weight, and having lopsided weight. It appears to be ideal but the travel will be affected as mentioned before. Try your best to find two twelves first before cutting this corner. Remember you can always use the other weights again, and possibly even get a discount on the ones your replacing with. Please also consider if you currently have 6lb weights they are almost useless for windows. If a scrap yard offers you a couple of pence for them do not be insulted. It’s just they are very difficult to find a use for and they are in total oversupply. Useable weights that are of high value are 9lb and up. These you should not give away for a few pence, and if that’s all that is on offer, keep them.
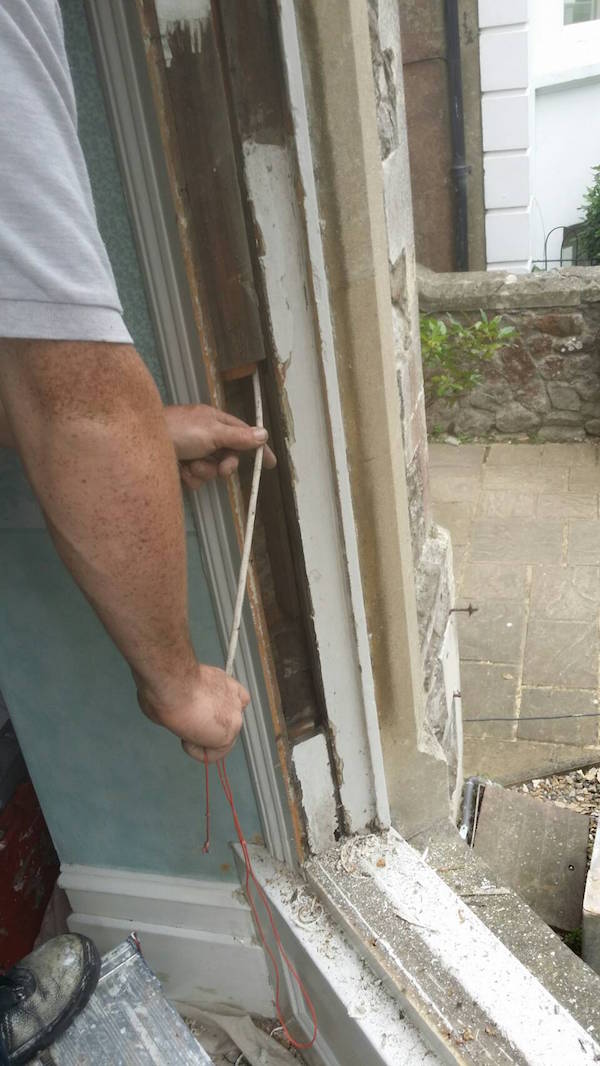
With your mouse you made earlier, attach the sash cord, then thread this through the pulley and down the back of the box, and then pull the cord through the box. Take a look at this picture below for example. The mouse lead goes first and then where you’ve attached the string section of the mouse to the cord, when the lead becomes visible lower down, you can pull the cord through that is attached to the string.
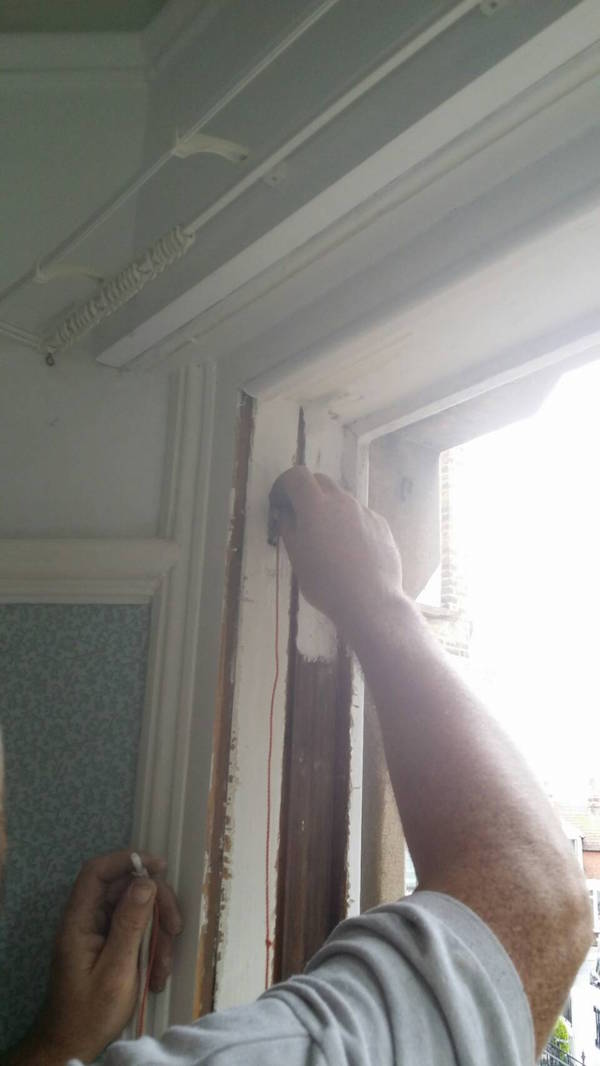
The second picture below here shows how the mouse has been pulled through and then this has drawn the sash cord with it.
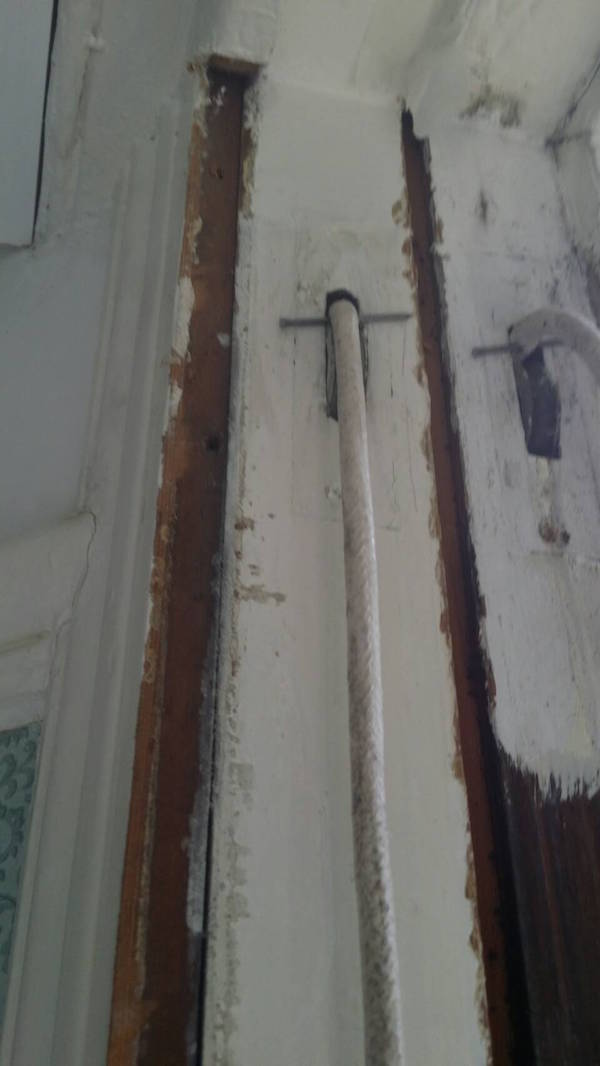
Then remove the mouse, attach the correct weight to the cord you’ve just pulled through the box. Ensure a good knot that won’t pull through the weight hole. If for example you sent the mouse through an upper sash pulley, you’ll attach an upper sash weight. Once the sash weight is attached place the sash weight back in the box. You may notice a thin piece of timber. This is called a parting slip. Ensure if it’s a top sash weight, the weight is placed to the outside of the box, and the lower sash weight to the inside. It is simply a divider to stop weights clashing, and hence called “parting slip”. Getting this wrong will result in snagging, which will be frustrating.
If your unsure, take a look at this image of the back of the box, which will explain much more clearly than I can with words alone. I wish I knew the name of this book, I’d love to credit them.
Once you’ve correctly figured out the parting slip, and which side to be on, pull the weight to the top ensuring it’s not snagging or caught, then on a step, take your side cutters and a 40mm panel pin, and push the pin through the cord, and slowly release, so the pin stops the cord just falling to the bottom of the box. Repeat this to all four cords and we are ready to hang the top sash. See image below
This stage is the most important because you can easily go wrong, take your time, ensure the cord runs freely, and is not snagged on the parting slip or even the frame. Sometimes old bits of brick and mortar can fall into the frame and cause a blockage. If this happens you’ll need to give the cord a good tug in order to free it, sometimes you might even need to open up the frame, if that’s the case, unless your extremely competent at DIY you might want to seek professional sash window advice.
9. Hanging the top sash.
Take note of the groove down the side of the sash and lightly mark the face edge of the sash at the bottom of the groove. We will now place the sash in the opening and you’ll probably need a friend to hold the top sash against the sill, while you take a top sash cord and prepare to cut the cord to the same height as the mark you made which indicated the bottom of the groove. Once put back together this guarantee’s full travel of your sash window. Now have your friend temporarily remove the sash, and you’ll install six annular rings, an inch apart on each of those two top sash cords that you just cut.
I just wan’t to clear something up here. Notice the cord is not to the bottom of the groove? It is set to the bottom of the useable groove. Make sure you don’t mark right at the bottom, mark where depth is enough that the cord can sit inside the groove. If you’ve an older, higher quality sash, your groove will start shallow like this, and then over the space of about 4 inches, get to a point deep enough that the cord will sit inside the groove. If you attach the cord outside of the groove in anyway, then you will scar the frame, as the sash slides, and the sash won’t work very well. In fact, if the fit was already good, it might end up being stuck.
Note. Get this next bit right, I’ve watched apprentices a hundred times hang the sash on the wrong cord. In some cases you’ll need to cord again if you damage the cord too badly. Offer the sash in and push the cord into the groove, and make sure the cord is at the height of your mark. While your friend holds the sash. You hammer the nails into the groove. This can be done on your own, in fact all professionals do, but it involves leaning against frames and balance. We need to remember sash windows are dangerous if done wrong, you or the sash could fall and it’s not worth risk just to replace a broken sash cord, so a friend to hold is considerably important. Now the cords are attached, remove the pins that are stopping the weights dropping on the top sash you just fitted and check the window works properly.
Here’s where we are at if all went well:
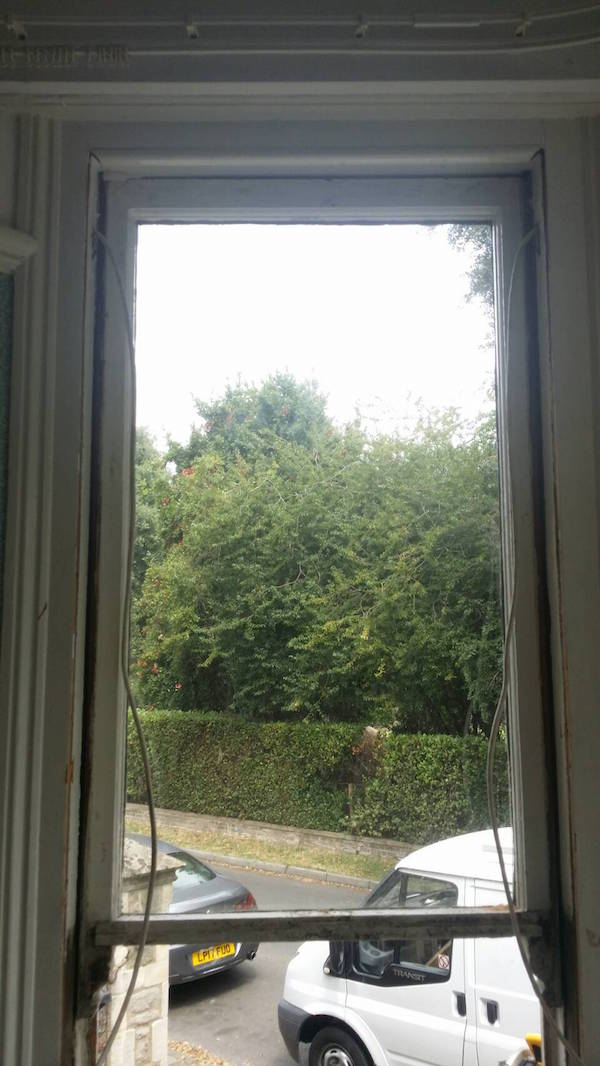
It should slide perfectly if you’ve followed along to this point.
10. Install parting bead on a sash window.
Push the parting bead gently back into the groove. It’ll fit nice and easy if you cleaned it up properly. Place a couple of pins, one at the bottom and one at the top to hold it well. Then run your sealant gun along the joint between parting bead and frame. Don’t go mad, a load of caulk is ugly.
The draught proofing isn’t part of the tutorial, this is a professional draught proofing system, but the parting bead principal remains the same.
11. Attach the lower sash.
Follow exactly the same procedure for attaching the upper sash with one difference, when you cut the cords at the mark you’ve made at the bottom of the grooves, allow an extra three inches of length. This will allow the lower sash to close nicely without affecting full travel of the sash. Once you’ve checked this sash travels nicely on to fitting the staff bead.
12. Attach staff bead and finish up.
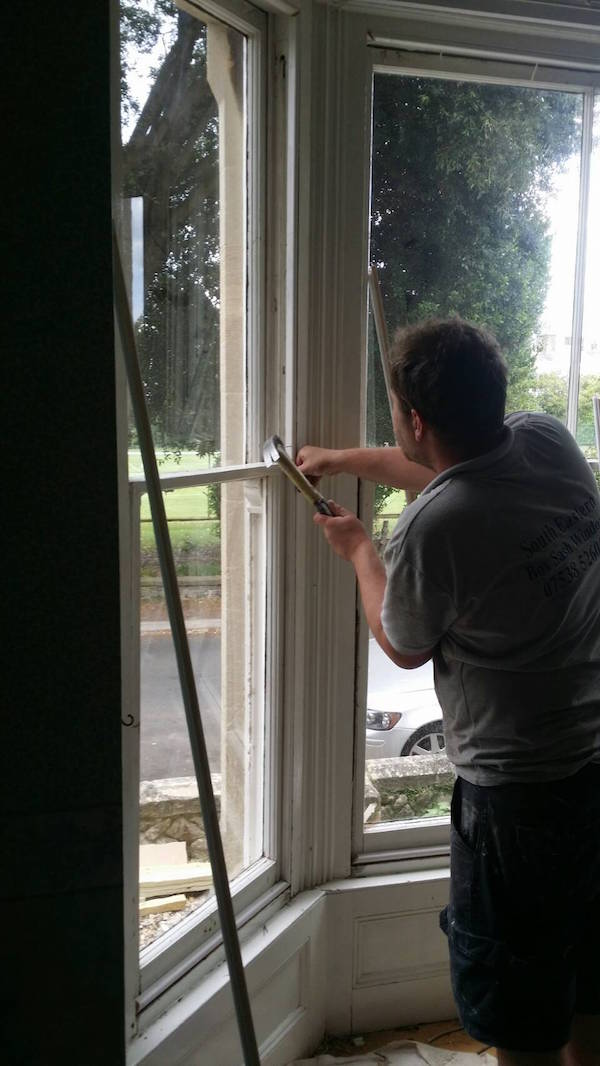
Attach the staff bead carefully, allowing just enough room for the top sash to travel smoothly, but not enough that it’s loose and will rattle in the wind. Seal the joint between staff bead and frame with sealant and touch up as you require. A tip to make the sashes glide at this stage is to oil the pulleys, and then spray silicone into the styles. Here is a picture of staff bead being refitted. The staff bead has been replaced by us, but the same principal applies to re-using. We had to replace for the draught proofing system.
Now is a good time to get the paint brush out. Sash window decoration is straight forward if done properly. First prep your surface areas correctly. Then apply an undercoat. If you’ve purchased a nice quality undercoat then expect the drying time to be in the region of 12 hours. Don’t try to shortcut this. Paint must be cured fully in order that you get the longest service from each time you decorate. If the layers are applied whilst tacky, they may never set properly and you’ll be able to push your thumb nail into the paint and scar it. I am sure you’ve all experienced that problem before now.
I hope you’ve enjoyed the write up on how to replace a broken sash cord and followed carefully you’ll save a great deal of effort making easy mistakes. Next you should consider DIY sash window draught proofing for a good project. There is an easy chance to save energy on your sash windows and do your bit for the environment. This doesn’t have to be all that costly either.