Did you know that it’s possible to decorate sliding sash windows without the need for costly scaffolding, in almost all situations? If you carefully follow this guide, I’ll show you how to produce a finish equal to that of a professional. I’ll also be giving you all the trade advice with regards to paint and materials.
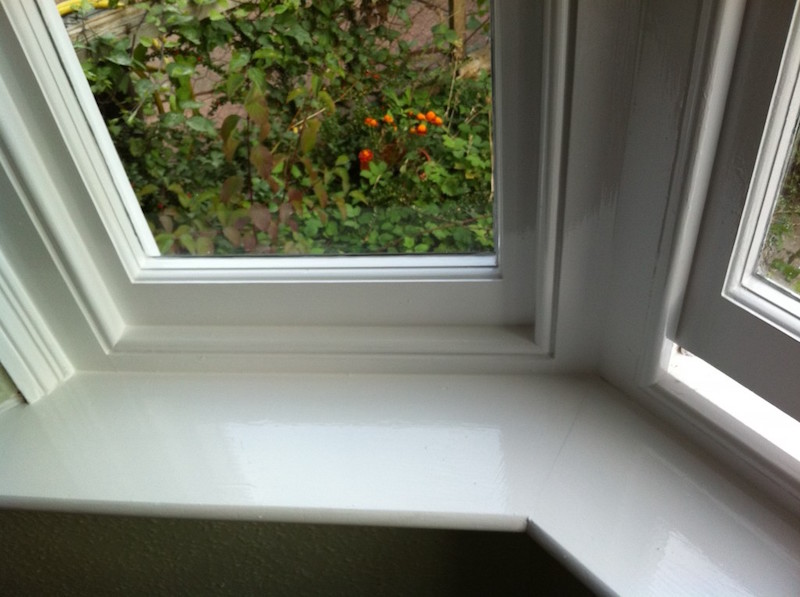
There’s no substitute for time and patience when decorating sliding sash windows and having many days on this project, is considerably more favourable than a contractors situation. You can genuinely save £240 per window minimum decorating your own sliding sash windows – and that is our very reasonable sash window prices. Plenty of companies are charging considerably more so it’s a really healthy saving if you have the time. One window will take approximately a day to a day and a half – the ideal scenario is a couple should be able to comfortably decorate three windows in a weekend. When you think about it like that, you are bound to have a few weekends spare here and there. If you follow the guide well results like the picture below are perfectly achievable.

Let’s get started! To make this easy to follow I am going to start with bullet point order of works and then below I’ll anchor to the relevant sections with an in detail and professional guide with expert tips to help you make the best job possible. Don’t worry if you don’t understand the bullet points or technical terms, they’ll be thoroughly covered in the detailed write up. If you require sash window repair, it’s important to carry these out before decorating.
I’ve made a comprehensive write up on ‘how to replace a sash window sill‘ or ‘how to replace a sash cord‘ if you’d like to give these a go. Otherwise, you might like to take a look at our sash window repair page. One things for sure, it’s a false economy to paint before repair, and you’ll need to do the job twice. Likewise if you’ve been considering a sliding sash window draught proofing system, do that first, you’ll only kick yourself down the line when you bite the bullet and have your sliding sash windows refurbished. By the way, I don’t want to push a sell on you here, but a draught proofing system really is worthwhile. There’s a whole host of facts related to draught proofing that’s worth a read. I also show you how to DIY draught proof your own sash windows.
The complete how to decorate sliding sash windows checklist
- Is your timber nice and dry? If yes, proceed to step 2, if not waiting is a good idea.
- Cover any furniture and flooring with quality dust sheets.
- Remove curtains, blinds, fixings, and anything that might be obstructing the windows, such as catches and locks.
- Prepare your materials.
- Scrape your sliding sash windows down removing loose debris.
- Rub up the frames well.
- Thoroughly brush down frames and glass.
- Prime exposed timber.
- Silicone seal the frame to mortar externally.
- Fill any blemishes and then sand to your desired finish.
- Prime any filler.
- Pull down top sash and prime external cheeks, external top half of the upper sash, external top half of the lower sash and pulley stiles.
- Push sashes up and sit on the sill.
- Paint the lower halves of both sashes and the remainder of the external frame.
- Paint the insides of the sashes and close the sashes
- Paint the internal framework and let this all set overnight firmly.
- Key up the surfaces with a light sandpaper to ensure gloss adhesion.
- Clean down sliding sash windows, and scrape off glass in preparation of finishing.
- Fill any minor cracks or blemishes with a caulk gun.
- Optional – Repeat steps 10 to 18 with another undercoat. Recommended externally if you have the time.
- Repeat steps 10 to 18 with gloss as opposed to undercoat.
- Refit furniture, re-install curtains.
That’s it. If you’ve followed along well it’s possible your sliding sash windows look something like this now.
The list might seem long and daunting but it’s really not, it’s broken into each miniature segments to make the process very easy to follow, and ticking off the list as you go will give you plenty of satisfaction.
As I previously mentioned, a bay window of three, or just three separate sliding sash windows is pretty much the ideal achievement in a comfortable weekend for a couple. You don’t want to push yourself with this, making a nice job relies on time for paint to cure properly, and following the order. Some items in the list might not make a lot of sense in terms of timing, especially the cleaning parts but all will be explained in detail now.
The complete how to decorate sliding sash windows in detail.
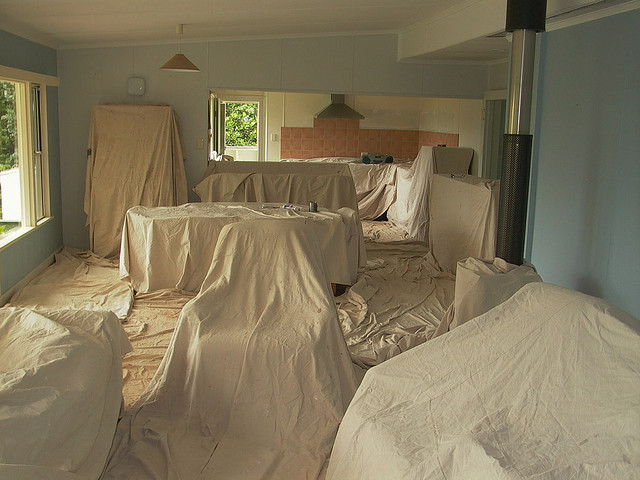
Cover any furniture and flooring with quality dust sheets.
It’s extremely important to ensure all of your valuables are well protected. Investing in 3 quality dust sheets will be ideal for a bay window. You’ll place one neatly under the window. The other two will be for covering furniture nearby. You will be sanding and everything will get dusty. Do not cut corners with a few dust sheets. If you manage to damage valuables then the saving made will be quickly lost. Consider running a dust sheet through the home, you can get longer dust sheets specifically designed lengthy to see you all the way to the front door. The image below is excessive, but it’s pretty professional.
Remove curtains, blinds, fixings, and anything that might be obstructing the windows, such as catches and locks.
Do not try to take shortcuts here. Any time and effort you think might be saved here, will not be. Not removing curtains will almost certainly result in a gust catching them, falling straight into wet paint. Painting around locks and curtain poles takes a lot longer than simply removing and fitting.
It’s very handy if you have a cordless drill, if not, well then it’s elbow grease but certainly don’t try to circumvent this item on the list. If you have a run of windows and your an avid DIY fan anyway, a 14volt cordless drill is a very useful tool, and over ten windows, will already of saved it’s money in time.
If you don’t follows this step, well I’ll say it before you’ve even finished ‘I told you so’! To put it into perspective, I would say this is the most important step from a professionals stand point in ensuring a quick and accurate job, fuss free.
Prepare your materials.
We’ve not actually talked about materials in any detail yet so let’s prepare a checklist of tools and materials we can take to Wickes or B & Q. If you decide to substitute the paint, I’d just point out that from my twenty years of sash window experience, no paint in this price range lasts as well, or offers a fresh look for longer.
I am not a Dulux salesman, in fact I really do not like large corporations and big brands, but credit where credit is due, Dulux really got it right with this range. So much so, I’ve been recommending it for ten years now!
- Dulux Weathershield primer – 1 litre will be adequate for three windows
- Dulux Weathershield undercoat -2.5 litre tin will cover three windows with plenty to spare
- Dulux Weathershield gloss – 2.5 litre tin again will give you some to work with on the following sliding sash windows.
- Epoxy two part filler for wood – if your not sure on this Google the phrase and you’ll find plenty of branded and unbranded options. No, In this situation I don’t like Ronseal, the big brand in the market – it’s over priced, and not a superior product. It’s a well known fact car body filler is a far superior product but sanding it without high powered equipment is impossible and also the dust is extremely bad for you. So I’d stick with a simple branded or unbranded two part filler from the search you’ve made. Note, this dust isn’t good either, wear a mask.
- Few tubes of decorators caulk.
- Few tubes of silicone.
- 80 and 120 grit sand paper.
- Dust sheets.
- Glass scraper – this is a scraper that cleans glass easily. I’ll add a picture under the list, it’s a super tool that professionals use to clean up the glass and enhance the overall effect of the decoration.
- 3 or 4 inch scraper for scraping off loose paint.
- 2 inch scraper for filling.
- Set of brushes.
- White spirits to clean up.
- Putty.
Here is a picture of your must have glass scraper.

Scrape your sliding sash windows down removing loose debris.
This part requires a good bit of elbow grease. Remove all flakey paint and check to see if any putty is loose. It must be removed and replaced or water will sit and wood decaying fungi will attack your timber.
Rub up the frames well.
After thoroughly scraping, its time to rub up the frames, removing previous blemishes and paint drips. It’s entirely down to you how much you try to clean up the frames. From a professional perspective, and inclusive of our standard decoration, we would probably spend about an hour rubbing up each window. The effects of rubbing up the windows have diminishing returns in value – remember you will never make these windows look brand new, no matter how hard you try, and you’d not of bought a beautiful period property if the odd discrepancy phased you. From my perspective, imperfection is part of the charm – that’s not to say a very nice overall finish can’t be achieved. One hour of prep will result in a window looks pretty nice. We occasionally get clients that want to strip the sashes back to timber. I always recommend against it because you are removing layers of protection. In some cases you may of had lead based paint, which is pretty much resistant to all elements, and part of the reason sliding sash windows in London have lasted so well.
Thoroughly brush down frames and glass.
All professionals understand the importance of preparation. If you brush down all dust and dirt, and clean up the glass, your going to do three things. Firstly you’ll have a positive and comfortable environment to work in. Keeping a clean and tidy workplace improves efficiency. More importantly than this, you are about to start painting. If any dirt falls into the paint it’ll mean rubbing back and going again. So clearing out loose dirt and dust is a must. Further to this, paint will not bond to the timber correctly if dust prevents clear adhesion, so it’s a must all round to get this right.
Prime exposed timber.
We bought a small tub of primer to cover any exposed timber. Make sure when you are finished there is no exposed timber visible. Also if any of the putty came out, make sure you prime the reveal as it’ll stop further timber decay.
Silicone seal the frame to mortar externally.
If you have any gaps between frame and mortar, you must seal these with silicone, or a high grade external sealant. Caulk can be used but it’s not ideal due to it’s shrinking properties. It cracks quite easily, if applied too thick.
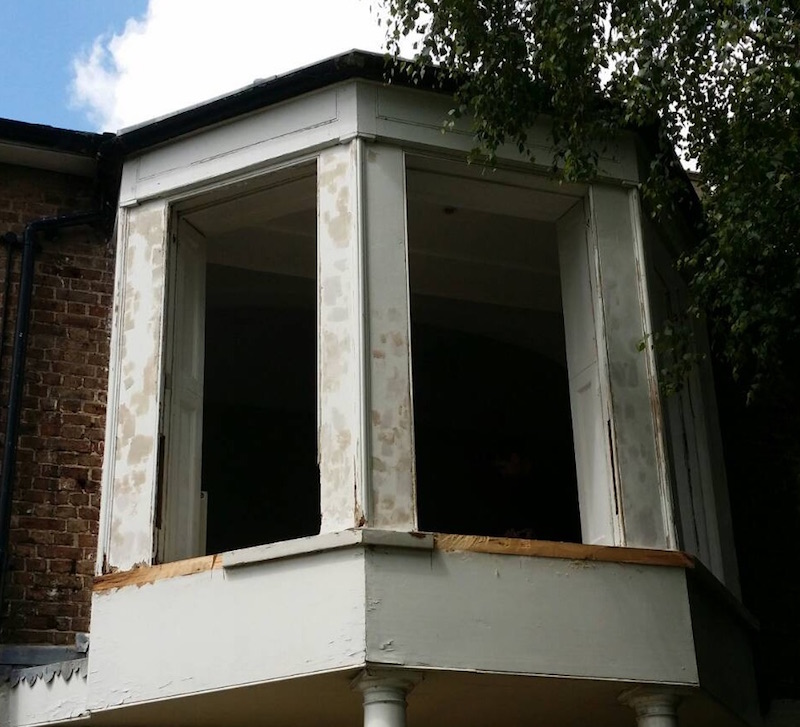
Fill any blemishes and then sand to your desired finish.
At this stage you will want to fill any catch marks, or other blemishes that drastically catch your eye. Some decorators used a powder filler, thats simply mixed up here. I don’t like it. Firstly it’s not durable, and secondly it takes forever to set, it’s not a great product and using a two part epoxy resin, while harder to sand, provides a better quality of finish for serious blemishes. There will be an army of decorators ready this with their arms up in outrage no doubt, but my advice is solid and will produce a better quality finish, even if you have to use more elbow grease for it. You are welcome to face up your sashes with powder filler, it will make them look nicer, but don’t use it for any repair, it’ll just break out. Here’s how a typical frame looks once we’ve filled. It’s pretty ugly, but that’ll be rectified as soon as paint covers – ignore the timber splices, though you can see how that turns out on our professional sash window decoration and painting service page.
This reminds me of one of the funniest times in my whole sash window career. I went to survey a property where a handyman had filled a whole bottom rail with powder filler. The client then paid as it looked brilliant. A couple of weeks later the whole rail full of filler, fell clean off! I shouldn’t laugh at the clients misfortune, but it was a one of a kind I assure you. The lesson of cutting corners well learn’t well!
Prime any filler.
Again brush down the windows and clear away all dust. At this point you prime the filler to seal it in. It’ll make for a lasting job. You will also replace any putty at this stage as well. Putty is a funny one, it takes months to cure well. In order that your fresh paint doesn’t split. Take some of that powder filler and mix it into your putty, this will speed the curing process and stop the oil bleeding. Technically this is not the right thing to do, but are you prepared to wait a month to decorate while the putty sets correctly? There’s no harm done, it’s a little trade trick – after all how would this work commercially if we waited a month after any re-putty work?
Pull down top sash and prime external cheeks, external top half of the upper sash,external top half of the lower sash and pulley stiles.
We are ready to start undercoating. The order I am about to explain to you will minimise the amount you need to move your sashes, it’ll also result in being able to decorate your sliding sash windows from the inside without scaffolding. There’s an important thing to talk about here. Safety. You must have a nice set of steps that mean you are not leaning out of your window and you are well balanced. Secondly you should be wearing a harness tied to an object that would hold if you did manage to fall out.
Now we’ve got that out the way for my disclaimer purposes, in all seriousness, be careful! So start by pushing both sashes to the bottom. Then raise the lower sash about 12 inches. This will give you clear access to the outside top section of the lower sash. Paint this first.
Then once you’re ready, push the lower sash to the bottom and decorate as much of the top section, of the outside of the upper sash as you are comfortable with. Then push this sash to the bottom.
At this point you’ll decorate the outside cheeks and then the inside of the frames. Just pull the sash cords out of the way when you paint behind. You ideally won’t get any paint on the cords or the pulleys. Once this is done, you may push the sashes to the top – be as careful as possible, scars will all take time to touch in at the end.
Push sashes up and sit on the sill.
We’ve completed the top half of the outside. This is the most difficult job out the way. Note, it’ll need doing twice again if you double undercoat, and once more if you go straight onto gloss.
Paint the lower halves of both sashes and the remainder of the external frame.
Now with sitting on the sill, the lower half of the outer sashes are easy to reach. So is the outer cheeks. Decorate these, carefully push the sashes back up, and then do not paint the sill.
Paint the insides of the sashes and close the sashes
Carefully, juggling the sashes around as you have for the outside, now carry out the same process for the inside. Now just before you are about to close the sashes and paint the frame, just finish up the sill. It’ll result in the cleanest looking sill if you follow this order. Professional Tip – leave a one inch gap top and bottom, it’ll stop the sashes sticking shut permanently.
As you can see, if you hadn’t cleaned down the frames well the much would have fallen or got stuck in paint. A big part of the finish looking good is your effort in cleaning and preparation
Paint the internal framework and let this all set overnight firmly.
Now your sashes are undercoated, finish the frame and decorative surrounds. Always work from top to bottom to stop dirt falling on fresh paint. Once this is done, clean up the brushes and take a rest, there’s nothing more to do until this coat of paint is cured. You could always go onto the next three windows I suppose but honestly, this is a job to just take it steady.
Key up the surfaces with a light sandpaper to ensure gloss adhesion.
This is a ten minute job, just make sure you catch all paint with a couple of passes, nothing fancy. You should do this even if you intend on undercoating a second time.
Let’s talk about a second undercoat – both good and bad. If your sashes are already tight in the frame, don’t do it, you risk sticking up your sliding sash windows, which made this whole process pointless. Otherwise, an extra layer of protection will result in an extra year or two out of your decoration. So the choice is yours. We quote for one undercoat and it is sufficient.
Clean down sliding sash windows, and scrape off glass in preparation of finishing.
Now that you’ve sanded, take out the specialist glass scraper and clean up the glass. Then wash the glass as well. You can use any good glass cleaner to do this.
Fill any minor cracks or blemishes with a caulk gun.
If you notice any last minute cracks or blemishes, catch them with a caulk gun.
Repeat steps 10 to 16 with gloss as opposed to undercoat.
Just follow through the same method as we discussed in points ten to sixteen with your gloss and you’ll be in great shape. Allow the gloss a night to cure fully and then onto the final stage.
Refit furniture, re-install curtains.
Before you put up curtains or any fabric near the paint, ensure it’s cured. Undercoat will certainly set well overnight but sometimes if gloss is applied to thick, it won’t set in a night. Gloss doesn’t come out of fabric easily so it’s always better to check. Now is a good time to fit a nice new Brighton Fastener as opposed to fitting the old furniture back, and it’ll help upgrade your sash window security. Pictured below is a nice example.